How to adjust the ink density for screen printed wash labels?
Leave a message

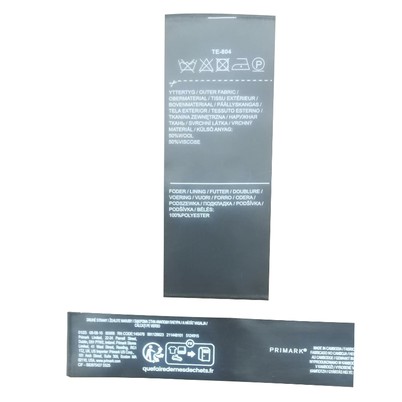
Hey there! As a supplier of Screen Printed Wash Labels, I've dealt with all sorts of issues related to these labels. One of the most common problems that often comes up is adjusting the ink density for screen printed wash labels. In this blog, I'm gonna share some tips and tricks on how to get that perfect ink density.
Why Ink Density Matters
First off, let's talk about why ink density is such a big deal. The ink density directly affects the visibility and durability of the wash label. If the ink density is too low, the text and images on the label might be faint and hard to read, which is a no - no, especially for important care instructions. On the other hand, if the ink density is too high, the label could end up looking blotchy, and the ink might not dry properly, leading to smudging and other quality issues.
Factors Affecting Ink Density
There are several factors that can influence the ink density in screen printing wash labels.
- Screen Mesh: The mesh count of the screen plays a crucial role. A higher mesh count means smaller holes in the screen, which allows less ink to pass through. So, if you're using a high - mesh screen, you might need to adjust your ink viscosity or printing pressure to get the right density. For example, a 305 - mesh screen will give a thinner layer of ink compared to a 156 - mesh screen.
- Ink Viscosity: Viscosity is basically how thick or thin the ink is. Thicker inks tend to deposit more on the label, increasing the ink density. You can adjust the viscosity by adding thinners or thickeners. But be careful, as changing the viscosity too much can also affect the drying time and adhesion of the ink.
- Printing Pressure: The amount of pressure you apply during the printing process matters. More pressure forces more ink through the screen, increasing the density. However, too much pressure can also cause the ink to spread out and create a messy print. You need to find that sweet spot where you're getting enough ink on the label without over - doing it.
How to Measure Ink Density
Before you start adjusting the ink density, you need to know what you're working with. One of the easiest ways to measure ink density is by using a densitometer. This handy device measures the amount of light absorbed by the ink on the label. You can take readings at different points on the label to get an average density value.
If you don't have a densitometer, you can also do a visual inspection. Compare the printed label with a reference sample that has the desired ink density. Look for differences in color intensity, sharpness of the text, and overall appearance.
Adjusting Ink Density
Now, let's get into the nitty - gritty of adjusting the ink density.
- Changing the Screen: If you find that the ink density is consistently too low, you might want to switch to a lower - mesh screen. This will allow more ink to pass through and increase the density. Conversely, if the density is too high, a higher - mesh screen could be the solution.
- Modifying Ink Viscosity: As I mentioned earlier, you can adjust the viscosity of the ink. If the density is too low, add a small amount of thickener to the ink. Stir it well and do a test print. Keep adding small amounts and testing until you reach the desired density. If the density is too high, add a thinner to make the ink more fluid.
- Altering Printing Pressure: If you notice that the ink density is uneven across the label, it could be due to inconsistent printing pressure. You can adjust the pressure on your printing press. Some presses have adjustable pressure settings. Start by making small adjustments and printing test labels until you get a uniform density.
Troubleshooting Common Issues
- Ink Bleeding: If you see the ink spreading beyond the intended areas on the label, it could be because the ink density is too high or the viscosity is too low. Try using a higher - mesh screen, thickening the ink, or reducing the printing pressure.
- Faint Printing: Faint printing usually indicates low ink density. Check the screen for blockages, adjust the ink viscosity, or increase the printing pressure.
Importance of Quality Control
Once you've adjusted the ink density and got a good test print, it's essential to have a quality control process in place. Print a batch of labels and randomly select samples for inspection. Check for consistency in ink density, color, and overall print quality. This will help you catch any issues early on and ensure that all your labels meet the required standards.
Related Products
If you're in the market for different types of wash labels, we offer a variety of options. Check out our Recycled Soft Satin Label, which is not only eco - friendly but also has a soft feel. Our Ingredient Wash Label is perfect for products that need to display detailed ingredient information. And if you're looking for labels with vibrant colors, our Color Wash Label is a great choice.
Conclusion
Adjusting the ink density for screen printed wash labels is a combination of science and art. You need to understand the factors that affect ink density, measure it accurately, and make the right adjustments. By following these tips, you can ensure that your wash labels have the perfect ink density, which means better visibility, durability, and overall quality.
If you're interested in our Screen Printed Wash Labels or have any questions about ink density adjustment, don't hesitate to reach out. We're always here to help you get the best - quality labels for your products.


References
- "Screen Printing Technology Handbook"
- "Ink Formulation and Printing Processes"
- Industry research on screen - printed label manufacturing